This post may contain affiliate links. Please read our full Disclosure Policy.

Try crafting these simple wood slice ornaments this year to add a touch of rustic Scandinavian charm to your Christmas decorations! I’ll guide you through two easy ways to personalize these wooden ornaments to create unique DIY gifts or hang them on your Christmas tree during the holiday season.
Every Christmas, I like to try a new, easy way to make Christmas ornaments using natural elements. Over the years, I have made everything from dried orange garland to air-dried clay gift tags and even fresh evergreen winter wreaths! Making these homemade decorations and ornaments is always a fun activity that I can do with my kids. Plus, they make great gifts or stocking stuffers for loved ones, too!
Types of Wood To Use
If you are making wood slice ornaments from scratch, try finding a type of wood suitable for crafting with a smooth surface that is durable enough to withstand handling and hanging. In the past, I have used pine and birch poles to cut my slices from a larger piece of wood to make wood ornaments, and both work great. Just make sure to find ones that are big enough to fit your design and have been properly dried to prevent warping or cracking.
Shop DIY Supplies
Although these wood slices are very easy to make on your own, sometimes it is just easier to order them in. You can always find precut wood rounds at your local craft store, too. They come in many different sizes and wood colors!
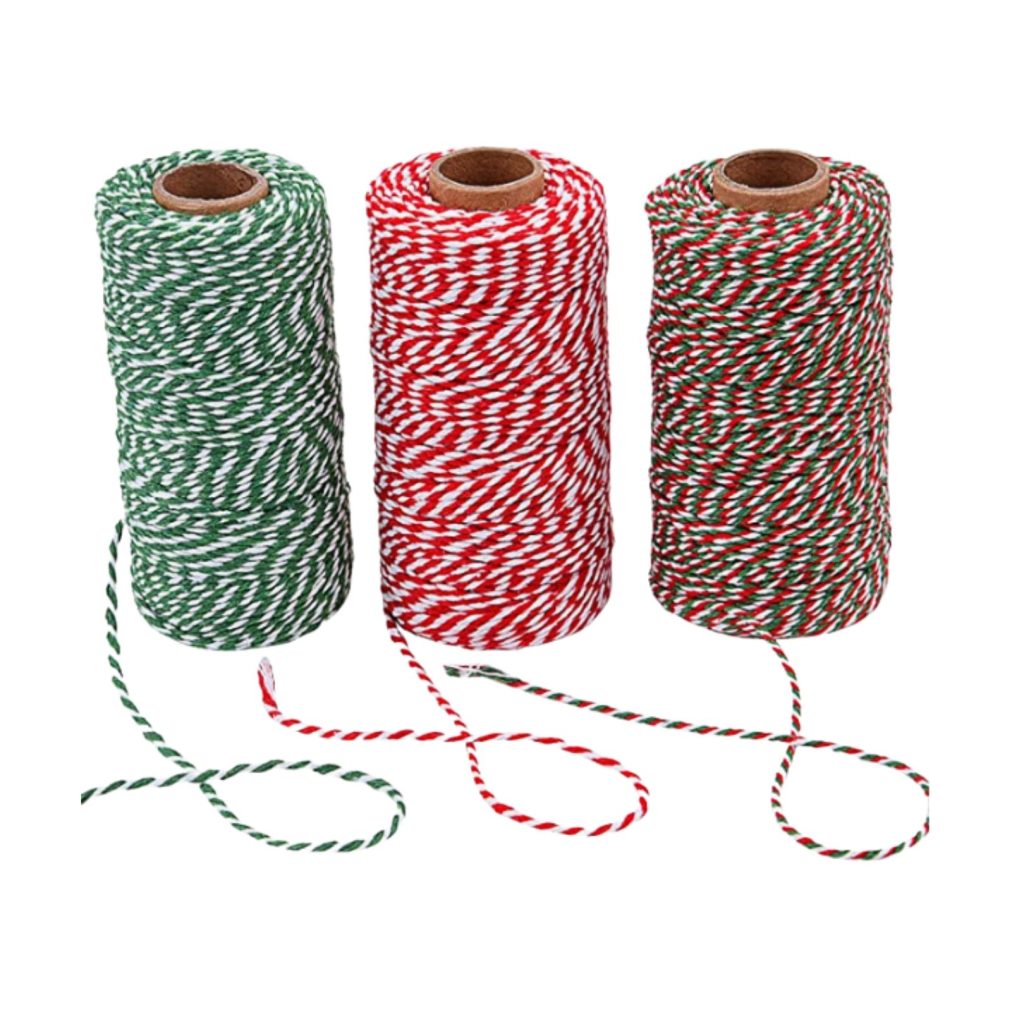
I also wanted to link the stamp letters I used and the simple Christmas twine that I use every year. Find more of my holiday craft supplies here, or if you are Canadian, find them in my Canadian Amazon shop.


DIY Wood Slice Ornaments Using Cameo or Cricut Designs
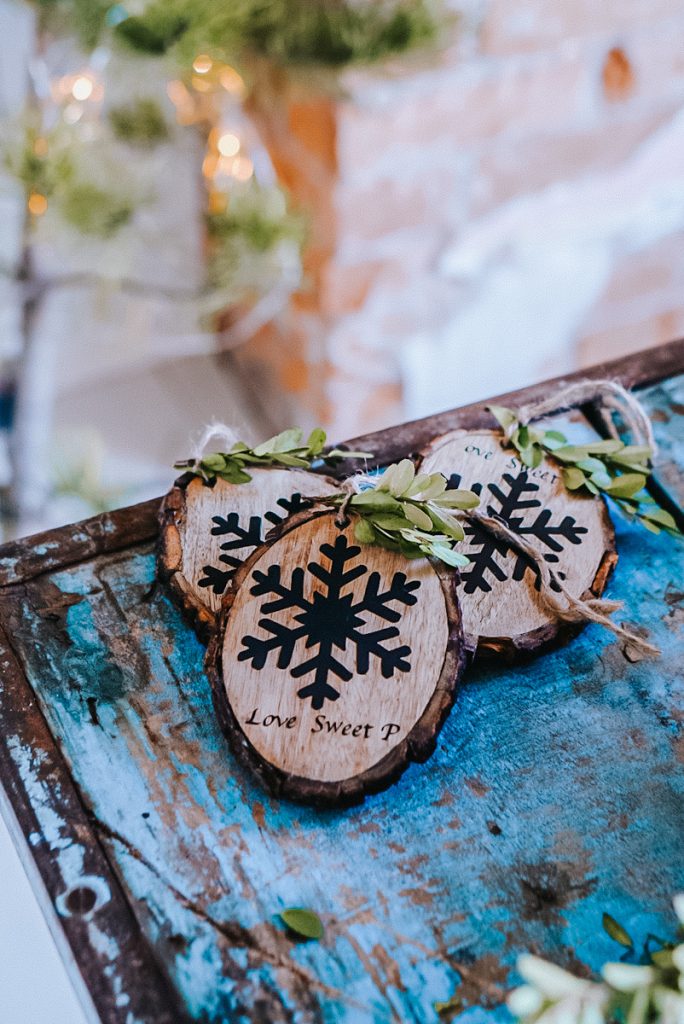
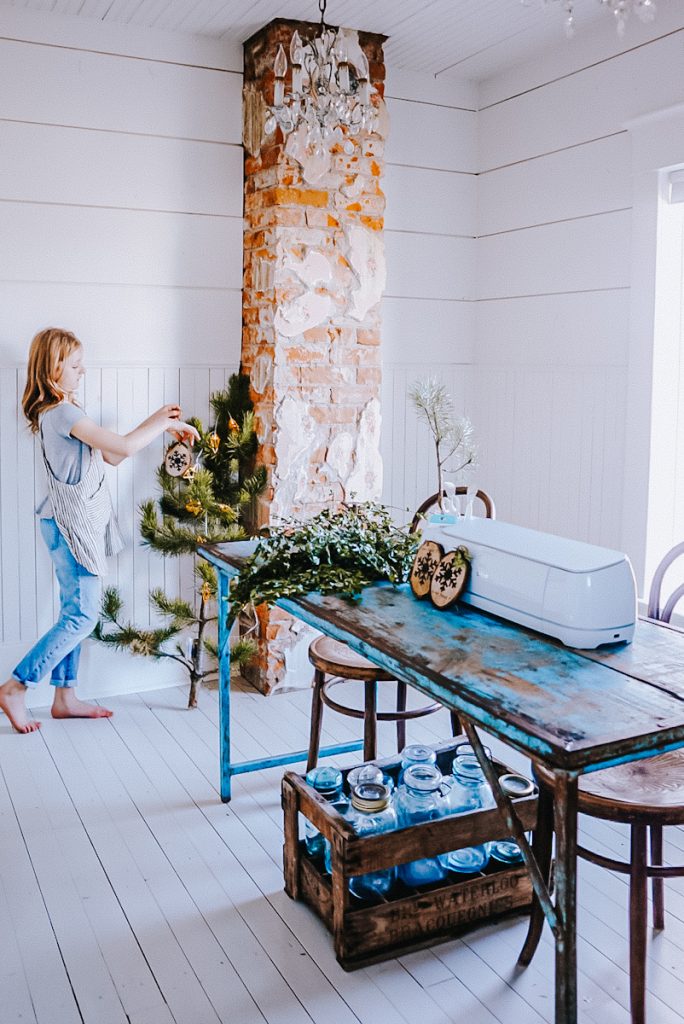
Last year, my daughter and I decided it would be a fun project to make wood circle ornaments for our teacher’s gifts. We used the Cricut design site to find a design we loved and then adhered the vinyl to the wood slices. This project was easy enough for my 10-year-old daughter to do almost entirely independently, and the result was beautiful!
Here’s the step-by-step guide on how to make DIY wood slice ornaments using a Cricut vinyl transfer:

Materials
- Wood slices
- Vinyl sheets
- Transfer tape
- Acrylic paint and brushes (optional)
- Twine or ribbon
- Clear sealant spray or polyurethane (optional)
Equipment
Instructions
- Prepare the Wood Slices – Sand the surfaces of the wood slices to create a smooth and even texture. If necessary, drill a hole near the top of the ornament. If you want a painted background, apply a thin layer of acrylic paint to the wood slices. Allow them to dry completely.
- Design in Cricut Design Space – Open Cricut Design Space and create or choose a design for your ornaments. There are so many beautiful options, and the program is extremely user-friendly. Just ensure you adjust the design dimensions to fit your wood slices.

Vinyl Application Tip:
Your image and text will be will be reversed on the wood, so make sure you flip the design horizontally before printing, if necessary.
- Cut Vinyl with Cricut- Load the vinyl sheet into the Cricut machine and select the appropriate settings for your material. Once the vinyl is cut, weed out the excess vinyl using weeding tools, leaving only your design on the backing.

- Apply Transfer Tape – Cut a piece of transfer tape slightly larger than your design. Carefully apply the transfer tape over the vinyl design, smoothing out any bubbles.
- Transfer Vinyl to Wood Slice – Position the transfer tape with the vinyl over the wood slice, ensuring proper alignment. Press the vinyl onto the wood surface, smoothing it out to adhere securely.

- Remove Transfer Tape – Gently peel off the transfer tape, leaving the vinyl design on the wood slice.

- Add Twine or Ribbon – Cut a piece of twine or ribbon to your desired length and thread it through the hole. I love using burlap twine or colorful Christmas twine for a different look. Tie a knot to create a loop for hanging.
- Seal (Optional) – You can apply a clear sealant spray or poly to protect the ornament and enhance durability. Allow it to dry completely before handling.

That’s it! So easy, and now your DIY wood slice ornaments using Cricut vinyl transfer are ready for your Christmas tree or be shared as gifts!
Vinyl Wood Slice Ornament Video
DIY Wood Slice Ornaments Using Stamps or Paint
I also love the look of wooden ornaments used as gift tags or tree ornaments. A few years ago, I cut birch tree rounds, and using a small lettered stamp set, I customized our gift tags for the presents that year. I also used some cute wood slice ornaments on the tree. Both ideas were quick and easy to make and were adorable! You could use this same DIY to make fun designs using a black paint marker or acrylic paints, too.
Here’s a step-by-step guide on how to make DIY wood slice ornaments using stamps:
Materials
- Wood slices
- Stamps of your choice
- Ink pads in various colors
- Twine or ribbon
- Clear sealant spray or polyurethane (optional)
Instructions
- Prepare the Wood Slices – If your wood slices are not precut, carefully slice them to your desired thickness. Sand the surfaces of the wood slices to create a smooth and even texture.
- Drill a Hole – Use a drill with a small bit to create a hole near the top of each wood slice for hanging.

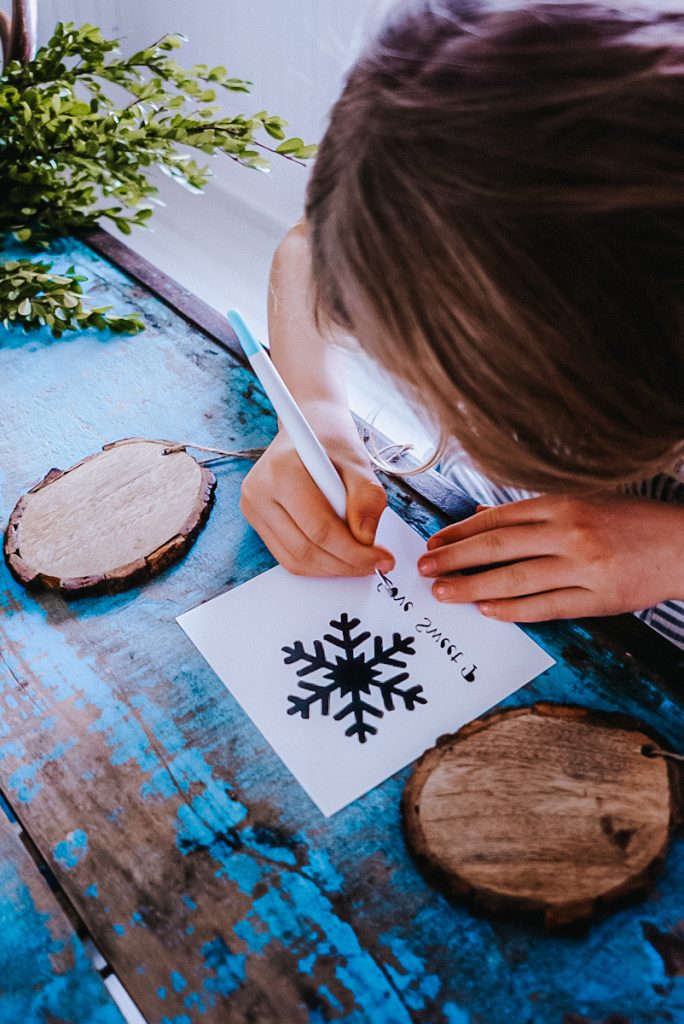
- Select Your Stamps – Choose the stamps you want to use for your ornaments. I used tiny block letter stamps so that I could write holiday messages on the wood slices, but you could try a festive design like snowflakes, holly, or tree silhouettes.
- Ink the Stamps – Ink the stamps with the desired colors. I kept mine to a simple black ink, but you can use multiple colors for a more intricate design. Or try a metallic ink for something more festive.
- Stamp the Wood Slice – Very carefully, press the inked stamp onto the wood slice firmly and evenly. Hold it in place for a few seconds to allow the ink to transfer. Ensure the stamp is centered on the wood slice before placing it!

- Allow Ink to Dry – Carefully remove the stamp from the wood slice. Be extra careful not to smudge the stamped area with your fingers as you remove the stamp. Allow the stamped design to dry completely before handling to prevent smudging.
Stamped Application Tip:
Be extra careful not to smudge the stamped area with your fingers as you remove the stamp.
- Repeat for Desired Designs – Once the first layer of stamping is dry, repeat the stamping process with different stamps and colors until you achieve the desired decorative effect on each wood slice.

- Add Twine or Ribbon – Cut a piece of twine or ribbon to your desired length and thread it through the hole at the top of the wood slice. Tie a knot to create a loop for hanging.
- **Optional: Seal with Acrylic Sealer – If you want to protect the stamped designs and add a subtle sheen, apply a thin coat of acrylic sealer or spray polyurethane. Allow it to dry completely.

Easy peasy! Your DIY wood slice ornaments with stamped designs are ready to be hung on your Christmas tree or layered with dried orange slices and used as gift tags as I did here.
Stamped Wood Ornament Video
Tips and Tricks For Making Wood Slice Ornaments
- To further protect the ornaments, you can use a clear sealant spray. Ensure the decorations are dry before applying the sealant.
- To prevent your wood slice ornaments from cracking, keep them away from temperature and humidity changes. Don’t display them in a sunny window, beside a fireplace, or by a heat register.

More Easy Holiday Projects
- How to Make a Homemade Gingerbread Village (Free Printable)
- How to Make Fresh Garland
- How To Make A DIY Scandinavian Tree Stand
Frequently Asked Questions
Wood slice ornaments may be cracking due to insufficient drying or seasoning of the wood before crafting, causing it to shrink and crack as it dries further. Additionally, extreme temperature and humidity changes can contribute to the wood’s contraction and expansion, leading to cracks over time. So, to prevent cracking, keep your wood ornaments away from sunny windows, fireplaces, and heat registers.
To prepare wood slices for crafts, sand the surfaces to achieve a smooth finish and eliminate any rough edges. Wipe away dust, and optionally, apply a clear sealer or primer for an even surface before proceeding with your chosen crafting techniques.
Yes, I recommend sealing wood ornaments with a clear sealant or polyurethane to protect them from moisture and add to their durability, especially if they will be displayed outdoors. The sealant helps maintain the quality of the wood and preserves the integrity of the ornament’s design.
want to save this recipe?
Enter your email & I’ll send it to your inbox. Plus, get great new recipes from me every week!
By submitting this form, you consent to receive emails from B Vintage Style.

How To Make DIY Wood Slice Ornaments (Two Ways)
Equipment
- 1 Drill with a small bit
- 1 Cricut or Cameo machine
- 1 Weeding tools
- 1 Scissors
Materials
- 1 Wood slices
- 1 Vinyl sheets
- 1 Transfer tape
- 1 Acrylic paint and brushes (optional)
- 1 Twine or ribbon
- 1 Clear sealant spray or polyurethane (optional)
Instructions
- Prepare your design in the Cricut Design Space software. You can choose from a wide range of pre-designed templates or create your own custom design.
- Once your design is ready, load the vinyl into the Cricut cutting machine and follow the instructions to cut out your design
- After the design has been cut, use the weeding tool to remove the excess vinyl from around the design, leaving only the desired shape on the backing.
- Cut a piece of transfer tape slightly larger than your design and carefully place it over the vinyl, using a scraper tool to ensure it adheres well.
- Gently peel off the backing from the vinyl, leaving the design on the transfer tape.
- Position the transfer tape with the vinyl design onto the wood slice, making sure it is centered and aligned as desired.
- Use the scraper tool to firmly press the vinyl onto the wood slice, ensuring that it adheres properly.
- Slowly and carefully peel away the transfer tape, leaving the vinyl design securely attached to the wood slice.
- Allow the vinyl to fully adhere to the wood slice before adding any additional decorations or hanging the ornament.
- Enjoy your personalized ornaments or gift tag!
Video
Notes
Tips and Tricks for Making Wood Slice Ornaments
- Experiment with different types and sizes of wood to add variety to your ornaments. Different wood grains and colors can create an interesting assortment.
- If you plan to paint the wood rounds, lightly sand the surface before painting to help the paint adhere more effectively.
- Try different finishes, such as glossy, matte, or distressed, to achieve the desired look for your round wood ornaments.


I consider something truly special in this website .
I really appreciate this kind comment. Thanks you Chantal.