This post may contain affiliate links. Please read our full Disclosure Policy.


This step-by-step DIY air dry clay Christmas ornaments tutorial is easy to make! Handmade clay ornaments are beautiful decorations to hang on your tree or use as a gift for the holiday season!

Every holiday season, I love to create handmade or natural Christmas ornaments to use throughout our home. Air-dry clay is one of my favorite materials to work with. It is so easy to use and produces the most beautiful, one-of-a-kind ornament or handmade gift.
Clay Christmas Ornaments
In years past, I have also made air-dry clay villages and houses with this same method. No matter what you decide to make for the holiday season, working with this type of clay is a wonderful option for a Christmas craft.

Working With Air Dry Clay
Air-dry clay is the easiest type of clay to use for the beginner DIYer. It is easy to find at most craft stores, hardware stores, and even online. Not only is it affordable but it is also easily stored once it has been opened so you can use it repeatedly.
One of the most wonderful things about this particular type of clay is that it does not require baking. It is extremely easy to work with and is safe for all ages to use, so let the kids have some fun!

Homemade Christmas Decorations and Ornaments
Over the years, our family has used air dry clay to make many different types of DIY Christmas ornaments. Here are a few ideas for what you can make with air clay for a creative project at Christmas:

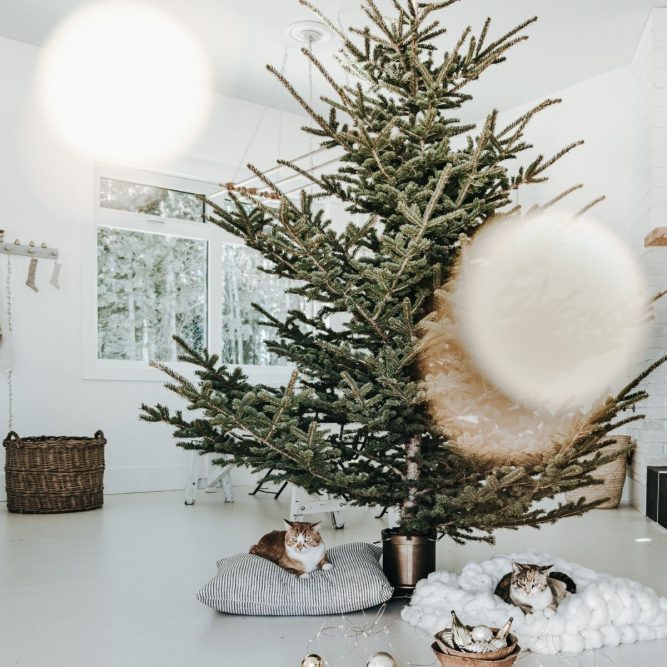
Christmas Tree Ornaments
From simple star ornaments with stamped initials or holiday words to embossed Christmas trees with pine or evergreen stamping, the possibilities are endless.
For a minimal Christmas tree look, try adding different size clay ornaments of the same style. Or add a collection of all different styles for a more traditional look.
Clay Christmas Village

Similar to making a flat-lay Gingerbread Village, a clay Christmas village is a beautiful way to decorate a mantle or hutch for the holidays. You can cut the houses and buildings for your village out by hand or use a template like the free printable gingerbread village I have here.
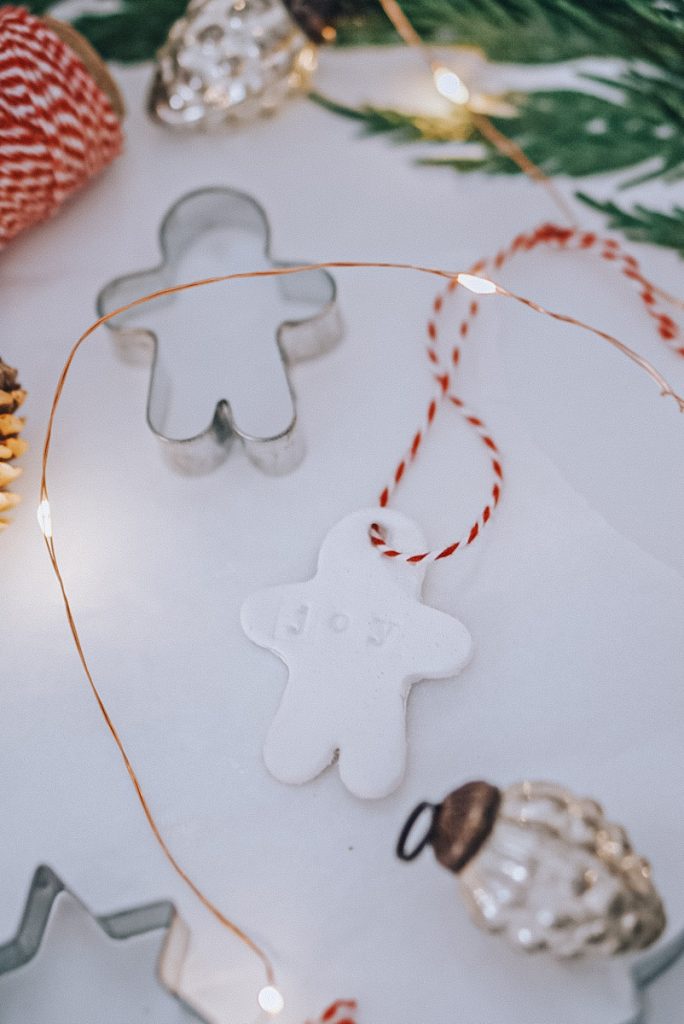
Personalized Christmas Gift Tags
Adding a personalized Christmas gift tag made of air dry clay is a great way to make a family member or friend a lovely holiday keepsake. You can leave them simple or add stamped initials to the tag to personalize them.
No matter what you choose, this thoughtful clay tag will take your gift to the next level and leave the recipient feeling special.

Step-by-Step Tutorial On How To Make Air Dry Clay Christmas Ornaments
Now that you know a little more about how air dry clay works and what you can make with it, let’s get started on making these adorable clay Christmas ornaments for the holidays.

Materials Needed
- Air Dry Clay
- Rolling Pin
- Christmas Tree Cookie Cutter Set
- Gingerbread Man Cookie Cutter Set
- Star Cookie Cutter Set
- Round End Stick
- Twine or fishing line
- Decorative Embossing Rolling Pins
- Natural Embossing Elements (Leaves, flowers, pinecones, or evergreen branches)
- Pressed Flowers
- Mod Podge
- Paint of your choice
- Stamping Set
Directions for Making Air Dry Clay Ornaments
- Begin by tearing off a piece of clay and warming it up by rolling it around in the palm of your hands. This step is important because it will make your clay much more workable.
You can add a few drops of water to your fingertips and the clay when you are working with it to ensure it doesn’t get sticky. Continue to add water while working with the clay.

- Using a rolling pin and a smooth surface (a silicone mat works great), roll out molding clay to about a 1/4″ thick. Be careful not to make these ornaments too thin as they will curl and crack when drying. If the clay is too thick it may not dry correctly.
Feel free to place a piece of parchment paper or wax paper on any surface you don’t want the clay to touch.
- Optional* At this point, you can use the decorative embossing rolling pin, flowers, leaves, or plants to emboss the clay. Simply place the stems onto the clay and use a French rolling pin or bottle over the top to gently imprint into the clay.
Be careful not to push too hard or risk your clay thinning out too much.

To add text on top of your clay, place your stamps in order on top and press down gently. Make sure you don’t press too hard, or you will see the edges of the stamps on the clay.
Embossing Clay Ornaments
- Once you are happy with how the clay is embossed or rolled, carefully remove the stems or stamps from the clay ornament. Then cut the clay out using a Christmas cookie cutter of your choice.
It is important to make sure your cut out is fully cut before you try to move it. It can sometimes be helpful to wiggle the cookie cutter to make sure all the clay is in fact cut.
Use a bit of water on your fingertips to smooth out any rough edges on your ornament before it begins to dry.

- If you are hanging the ornament or using it as a gift tag, use a round wood stick and punch a hole in the top of your ornament. Make sure it is large enough for the twine, ribbon, or string to go through.
- Place ornaments on a cookie sheet and let your ornaments dry overnight or even for up to 24 hours. You want to be sure that your ornament is completely dry!
- Once your ornament is dry, you can add any decorative paint or Mod Podge sealant to the piece if you wish. Air-dry clay DOES NOT need to be sealed; however, it is entirely an aesthetic choice. I love the matte, earthy appearance of a nonsealed ornament.

If desired, you can add a dried or pressed flower to the top of the ornament using Mod Podge at this point. Be sure to apply a top coat of Mod Podge onto the flower and let it dry completely for 20-30 minutes.
- Thread through the twine, ribbon, string, or fishing line to make your ornament hangable. At this point, you can also add some pretty natural elements to the ribbon for added details.
- Hang it on a tree, in your home, or use it as a gift tag on your presents!
- ENJOY!!
Christmas Decorative Tools

16″ long, $14


Elk Deer Pattern Embossed Rossing Pin
15″ long, $15
5 pc set, $10


Pine Tree Forest Cookie Cutter
3″ round, $16
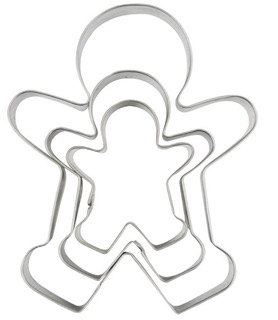
Gingerbread Man Cookie Cutter Set
Set of 3, $8
Small Alphabet Rubber Stamp Set
70 pcs, $18

How to Store Excess Clay
If you have an extra chunk of clay left over, it is easy to save and use later. The key is to seal it so no air can get to it. For best results, wrap the clay in plastic and store it in an airtight container or ziplock bag at room temperature. Use the clay again for your next fun project!
Storing Air Dry Clay Ornaments
Clay ornaments will last an extremely long time if you store them properly. Make sure to wrap them individually in bubble wrap or packing paper. Don’t use newspaper as the ink can wear off onto the ornament.
Once you have them safely wrapped for storage, place them in an airtight container for safekeeping throughout the year. Pull them back out when you are ready to decorate again next year.
Tips and Tricks for Making Clay Christmas Ornaments
- Ensure you don’t make the clay ornaments too thin or too thick. If you roll them out too much and they are thin, they will crack and curl when drying. If the clay is too thick, it may not dry completely. So ¼ “ seems to be the perfect thickness for making clay ornaments.
- Use water on your fingertips throughout the process to smooth any rough edges. Water will also help to make sure that the clay doesn’t begin to dry or crack while you are still working with it.
- Wrap your clay ornaments in packing paper or bubble wrap and store them in an airtight container for safekeeping.
More Holiday DIYs

Frequently Asked Questions
If stored properly, clay ornaments will last a lifetime. Ensure to properly package them in bubble wrap or packing paper (don’t use newspaper as the ink could come off on the ornaments).
Store them in an airtight container to ensure no moisture gets to them, and these ornaments will last a very long time.
No, there is no need to seal air-dry ornaments; however, adding Mod Podge will help to give the ornament a more finished look. This is completely optional and based on personal preference.
Air dry clay can make many amazing ornaments, gifts, and one-of-a-kind items for the holiday season! Simple clay Christmas tree ornaments, flat-lay clay villages, and even fun one-of-a-kind pottery items like candle holders or napkin rings! The options are endless!
I hope you enjoyed this easy tutorial on how to make DIY air dry clay ornaments. This is one of those craft projects that are so much fun for the whole family and is great for kids of all ages! Try making a new type of homemade clay ornament each year for your holiday decorating! Don’t forget to Pin this post to come back to next time! Happy crafting, friends!
A printable copy of this tutorial is available to my email subscribers. If you aren’t on my list, and would like to join, just fill out the short form below, and the eBook will be sent directly to your inbox.

want to save this recipe?
Enter your email & I’ll send it to your inbox. Plus, get great new recipes from me every week!
By submitting this form, you consent to receive emails from B Vintage Style.

How to Make Air Dry Clay Christmas Ornaments
Equipment
- Rolling Pin
- Christmas Tree Cookie Cutter Set
- Gingerbread Man Cookie Cutter Set
- Star Cookie Cutter Set
- Round End Stick
- Twine or fishing line
- Decorative Embossing Rolling Pins
- Stamping Set
Materials
- 1 package Air Dry Clay
- Natural Embossing Elements (Leaves, flowers, pinecones, or evergreen branches)
- Pressed Flowers
- Mod Podge
- Paint of your choice
Instructions
- Begin by tearing off a piece of clay and warming it up by rolling it around in the palm of your hands.
- Using a rolling pin and a smooth surface (a silicone mat works great), roll out molding clay to about a 1/4″ thick.
- Optional* At this point, you can use the decorative embossing rolling pin, flowers, leaves, or plants to emboss the clay at this point.
- Cut the clay out using a Christmas cookie cutter of your choice.
- Use a round wood stick and punch a hole in the top of your ornament.
- Place ornaments on a cookie sheet and let your ornaments dry overnight or even for up to 24 hours.
- Once your ornament is dry, you can add any decorative paint or Mod Podge sealant to the piece if you wish.
- Thread through the twine, ribbon, string, or fishing line to make your ornament hangable.
- Hang it on a tree, in your home, or use it as a gift tag on your presents!
Notes
- Make sure you don’t make the clay ornaments too thin or too thick. If you roll them out too much and they are thin, they will crack and curl when drying. If the clay is too thick, it may not dry completely. So ¼ “ seems to be the perfect thickness for making clay ornaments
- Use water on your fingertips throughout the process to smooth any rough edges. Water will also help to make sure that the clay doesn’t begin to dry or crack while you are still working with it.
- Wrap your clay ornaments in packing paper or bubble wrap and store your them in an airtight container for safekeeping.


3 Comments